
 |
 |
 |
 |
 |
 |
 |
 |
 |
 |
 |
 |
 |
SIMULATION: TUTORIAL
Step 3: CREATING TRAINS (CONSISTS)
INTRODUCTION TO TRAIN EDITION TOOL
CREATE A NEW TRAIN
ADD CARS (WAGONS)
CREATE TWO MORE TRAINS
In the following, "train" and "consist" have the same meaning.
Likewise, words "car" and wagon" have the same meaning.
INTRODUCTION TO TRAIN (CONSIST) EDITION TOOL
Since the approach of CDM-Rail is to offer a realistic view of the real layout, and of all trains, unlike all other
layout driving softwares, it is necessary to provide a tool for building consists, realistic enough for a friendly
display, and with a length a close as possibe to the real train on the real layout.
In this page, we area going to create three trains which will be attached to the three routes created in the previous
page.
The train edit mode is accessed through the main menu bar by selecting
"Consists" >> "Edit (Create/Modify)"
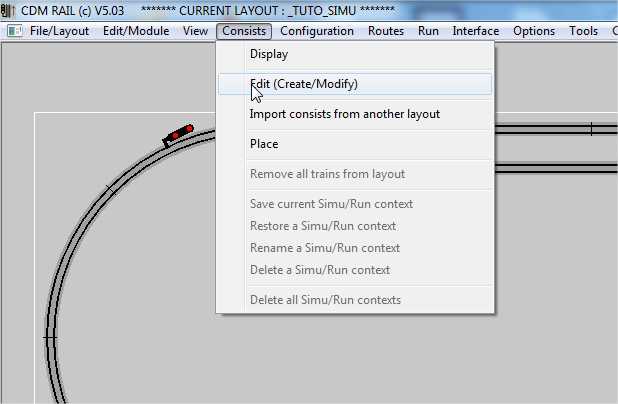
Figure 3-1: Train Edit mode selection
The train (consist) edit screen consists of four different areas:
-
The train edit toolbar located immediately below the main toolbbar, and containing 7 icons,
-
A "rolling stock" column containing locos and cars sketches. These pictures will be used for building the consists.
Note that loco are on a blue background, and cars on a green background. However, until now, there is no
functional difference between locos and cars. But this might change in the future. -
The biggest area (right of screen) is the train gallery, where all trains will be displayed (one train per row).
-
The leftmost area is where the train or car parameter menu will be displayed.
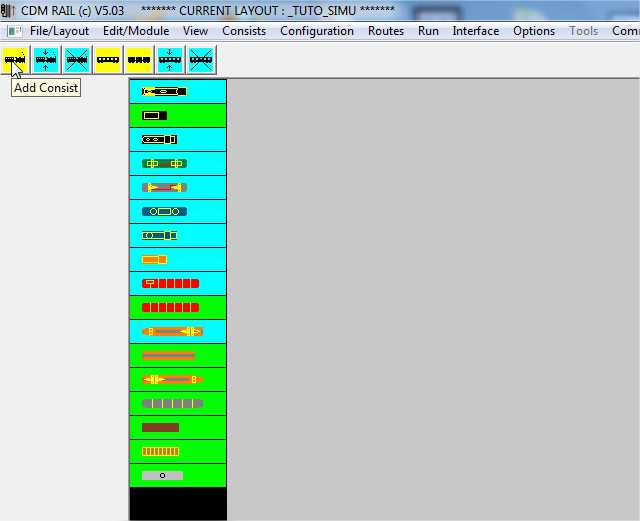
Figure 3-2: The train edit screen
The train edit toolbar contains 7 icons:
-
The three first icons (showing one loco and one car), are dedicated to global consist edition.
From left to right :-
Create new train (Add consist): yellow icon,
-
modify train: blue icon,
-
delete train: blue icon.
-
-
The four last icons (showing one or several cars) are dedicated to car (wagon) edition:
-
Add car: yellow icon,
-
Add another existing consist to current train: yellow icon,
-
modify car: blue icon,
-
delete car: blue icon.
-

Figure 3-3: The train edit toolbar
BACK TO TOP OF PAGE
|
|
|
|
CREATE A NEW TRAIN
To create a new train, click on the leftmost yellow icon.
The related train parameter menu appears on left of screen.
The main components of this menu are:
-
Train name,
-
Train length,
-
Train maximum speed,
-
Acceleration rate,
-
Deceleration rate,
-
A configuration groupbox (Protocol, address).
All parameters within this box can be captured ONLY in configuration mode, and are used ONLY in
RUN mode, not in plain simulation. So they won't be discussed in the scope of this tutorial. -
The abort (quit) and OK buttons.
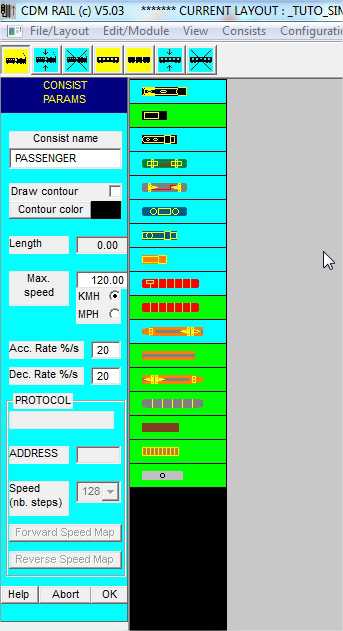
Figure 3-4: train parameters menu.
TRAIN NAME
Enter "PASSENGER": name for this train.
TRAIN LENGTH
This parameter is not editable.
The train length is automatically computed from the lengths of loco and cars which will be added.
This is why this value is 0, when creating the train.
TRAIN MAX SPEED
The default is in KMh (120 Kmh) but it can also be expressed in MPH.
The maximum speed is important since it won't be possible to make the train travel faster than specified.
For train "PASSENGER", just leave the default speed (120 Kmh).
ACCELERATION RATE / DECELERATION RATE
Each of these two parameters is expressed as a percentage.
This percentage is the ratio of speed variation during 1 second, to the maximum speed.
For example, an acceleration ratio of 20%, together with a maximum speed of 120 Kmh, implies that during
one second, the train speed will vary by 20% x 120 = 24 Kmh.
Thus, the same train will need 5 seconds to speed up from 0 to 120 Kmh.
Of course, these values are unrealistic, insofar as real trains have a much higher inertia.
But the problem at hand is that, on model railways, it is hardly possible to build long blocks, and the need for
decreasing inertia is obviously related to the length of blocks.
In present case, just keep the default values.
Click "OK" to confirm train creation.
A new row is created for train "PASSENGER", in the train gallery area, and a window pops up for inviting to select
the train loco (figure below).
Click "OK" in this window to erase it.
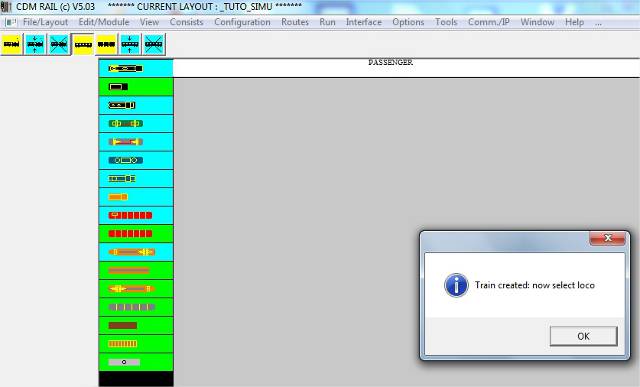
Figure 3-5: just after clicking "OK" in the parameter menu.
Now click (for selection) on the sixth item in the rolling stock column.
The parameter menu, on left of screen shows two main components:
-
the loco or car default color, which may be easily modified,
-
the loco or car length, which can also be customized.
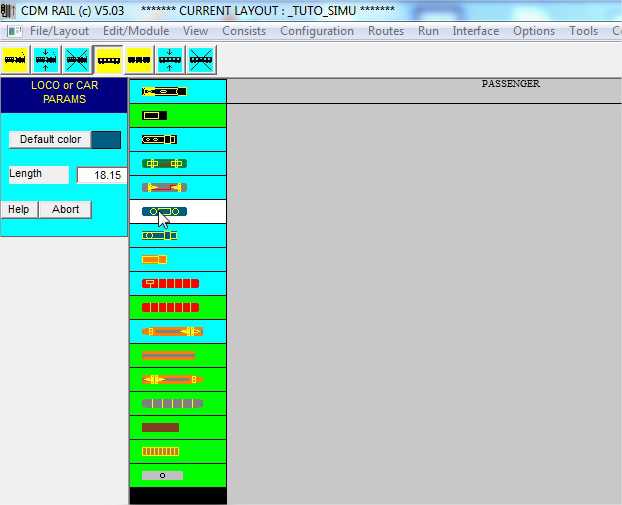
Figure 3-6: selecting the loco from the rolling stock column.
Now click within the row created for train "PASSENGER": the selected loco is instantiated within this train.

Figure 3-7: selected loco has been added (clicked) into train "PASSENGER"
BACK TO TOP OF PAGE
|
|
|
|
ADD CARS (WAGONS)
Let's now add cars.
Click on a passenger car (see screenshot below) ...

Figure 3-8: select passenger car from rolling stock.
... and instantiate it three times in the row dedicated to trin "PASSENGER".

Figure 3-9: car instantiated three times.
Note that this operation can be repeated at any time, from this train edit mode, by clicking on icon "add car"
(first yellow icon of the second group of icons).
After clicking on that icon:
-
first select a car from rolling stock,
-
then instantiate this car (by mouse click) on any train, and at any place, within the valid rows in the train
gallery.
Also note that any instantiated car may be modified at any time, by clicking on icon "modifiy car", (third icon of
the second group of icons).
Let us now check the train length:
-
click on icon "Modifiy Consist" (second icon from the left),
-
click on "PASSENGER" row, in the gallery.
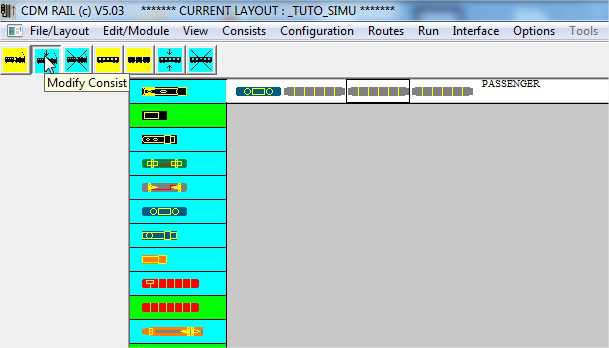
Figure 3-10: Selecting train "PASSENGER" for modification or display.
The parameter menu appears on left of screen.
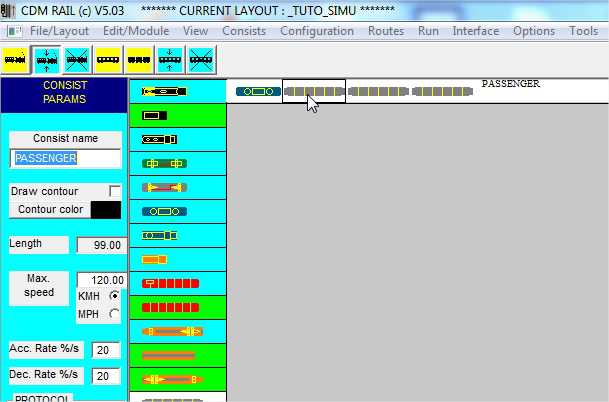
Figure 3-11: Train "PASSENGER" parameters / Length updated.
The train length parameter has been updated (99 cm), as a fonction of added cars.
However, if you sum up all car and loco lengths, this global length is a bit higher than this sum.
The reason is that the software adds a small fixed extra distance between two cars, to take coupling into account.
BACK TO TOP OF PAGE
|
|
|
|
CREATE TWO MORE TRAINS
Let's now repeat this creation process for two other trains: "FREIGHT" and "SHUTTLE"
TRAIN "FREIGHT"
-
Click on icon "Add Consist",
-
Set name to "FREIGHT"
-
Set maximum speed to 80 Kmh,
-
Click "OK"
-
Select loco from rolling stock (4th one in the example below)
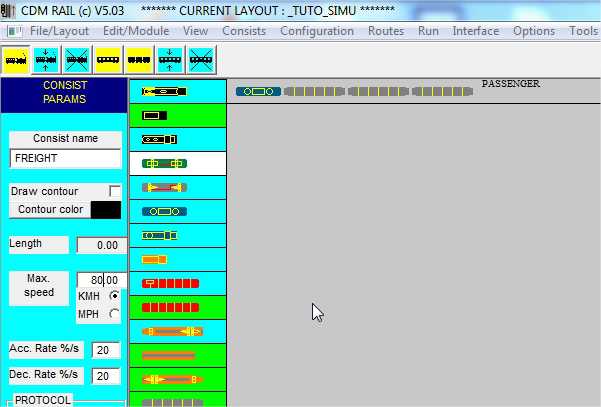
Figure 3-12: create train "FREIGHT"
-
Instantiate loco in row "FREIGHT".

Figure 3-13: instantiate loco
-
Select freight car (see figure below),
-
Instantiate four times in row "FREIGHT".
-
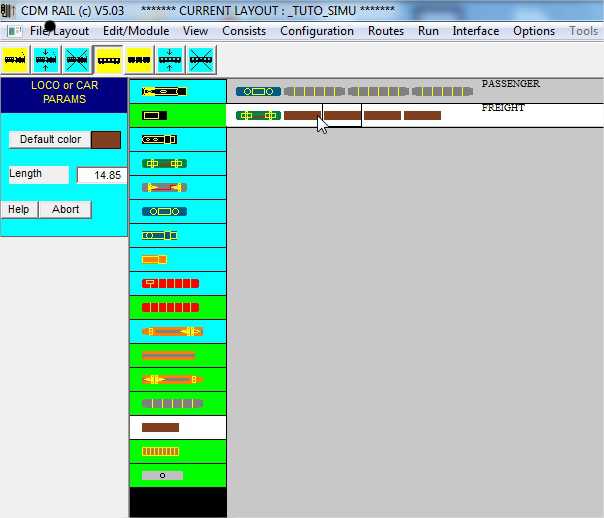
Figure 3-14: instantiate the freight wagon four times.
TRAIN "SHUTTLE"
-
Click on icon "Add Consist",
-
Set name to "SHUTTLE"
-
Set maximum speed to 100 Kmh,
-
Click "OK"

Figure 3-15: Create train "SHUTTLE"
-
Select engine car (see figure below),
-
Instantiate in row "FREIGHT".
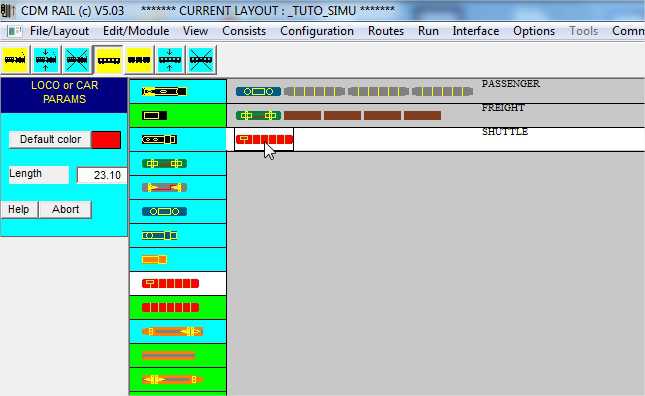
Figure 3-16: select engine car and instantiate in train "SHUTTLE"
-
Select trailer car (see figure below),
-
Instantiate in row "SHUTTLE".
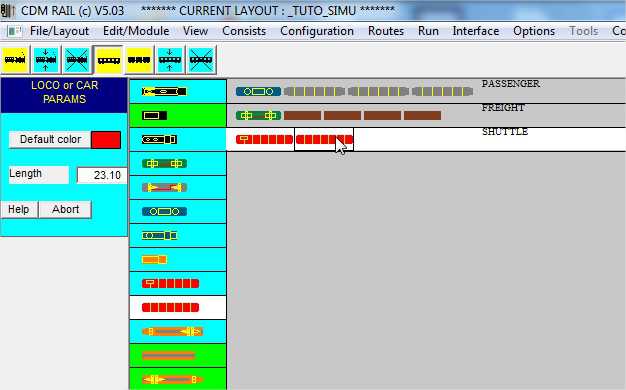
Figure 3-17: select trailer car and instantiate in train "SHUTTLE"
Download layout at the end of this step: TUTO_SIMU_03.lay
And now let's go the the next topic: setting train initial positions. Don't forget to save your ".lay"
Click on rigtht arrow below
 |
BACK TO TOP OF PAGE |
BACK TO TUTORIAL ROOT |
 |