
 |
 |
 |
 |
 |
 |
 |
 |
 |
 |
 |
 |
 |
SIMULATION: TUTORIAL
Step 5: SIMULATION
SIMULATION: WHAT FOR?
RESTORE AN INITIAL CONTEXT
START SIMULATION
CHECK TRAINS, ROUTES AND HALT TIMES
MODIFY TRAIN CRUISE SPEED / USING THROTTLE CONTROLLERS
STOP AND RESUME SIMULATION
SIMULATION MENU
QUIT SIMULATION MODE
SIMULATION: WHAT FOR?
The main benefit of the simulation is to evaluate the traffic capabilities of the layout.
It may happen that a layout is very nice to look at, and is designed to host many trains, and that unfortunately,
at the end of the story, it has a poor performance due to traffic bottlenecks.
The simulation is able to show these defects very rapidly, allowing to carry out the necessary modifications
before building the layout.
Another important benefit of the simulation, is that, when going up to layout automation via CDM-Rail, the real
layout behaviour is driven by the simulator. In other words, you start the RUN mode (with real layout connected)
exactly as you start a simulation. The only difference between RUN and simulation, is that an additional
synchonization occurs between real trains (on the layout), and virtual trains (on screen), thanks to the feedback
network.
The last benefit of simulation is just to look at it, since, again, realistic trains travel on a realistic layout view,
instead of a mere symbolic view. It is very friendly to look at trains travelling over the layout, mainly if some
scenery (cosmetics) have been added.
Though our tutorial layout is very simple, the 3-train example chosen generates enough traffic, as to demontrate the
simulation capabilities, and strongly activate the built-in security algorithm.
BACK TO TOP OF PAGE
|
|
|
|
RESTORE AN INITIAL CONTEXT
Before starting simulation, it is necessary to set trains to their initial location, as explained in step 4.
But since we have created a simulation context (CTXT_1) with this initial state, it is much simpler to
restore it:
"Consists >> Restore a Simu/RUN Context"
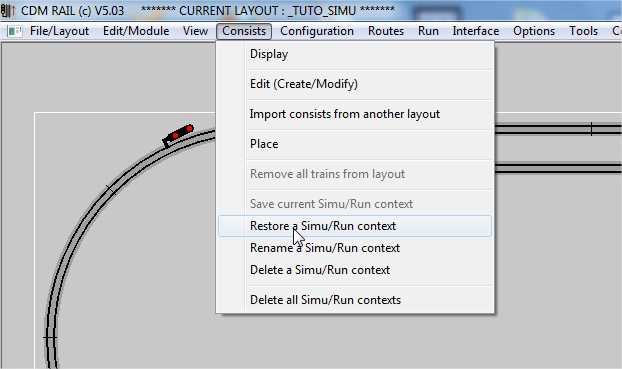
Figure 5-1: retore the simulation context saved in step 4.
We recognize our layout, identical to what had been saved at the end of step 4.
We are now ready for launching the simulation, by clicking button "SIMU", in the simulation window.
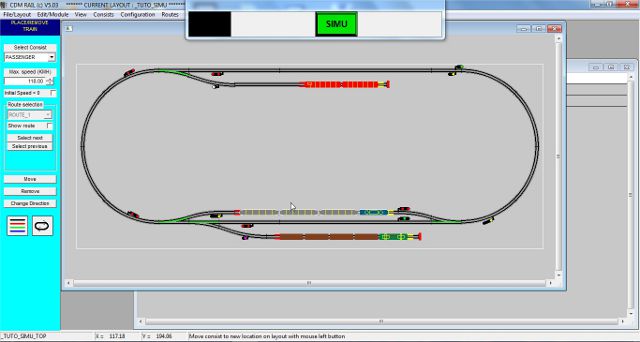
Figure 5-2: after context restore: ready to lanch simulation.
BACK TO TOP OF PAGE
|
|
|
|
START SIMULATION
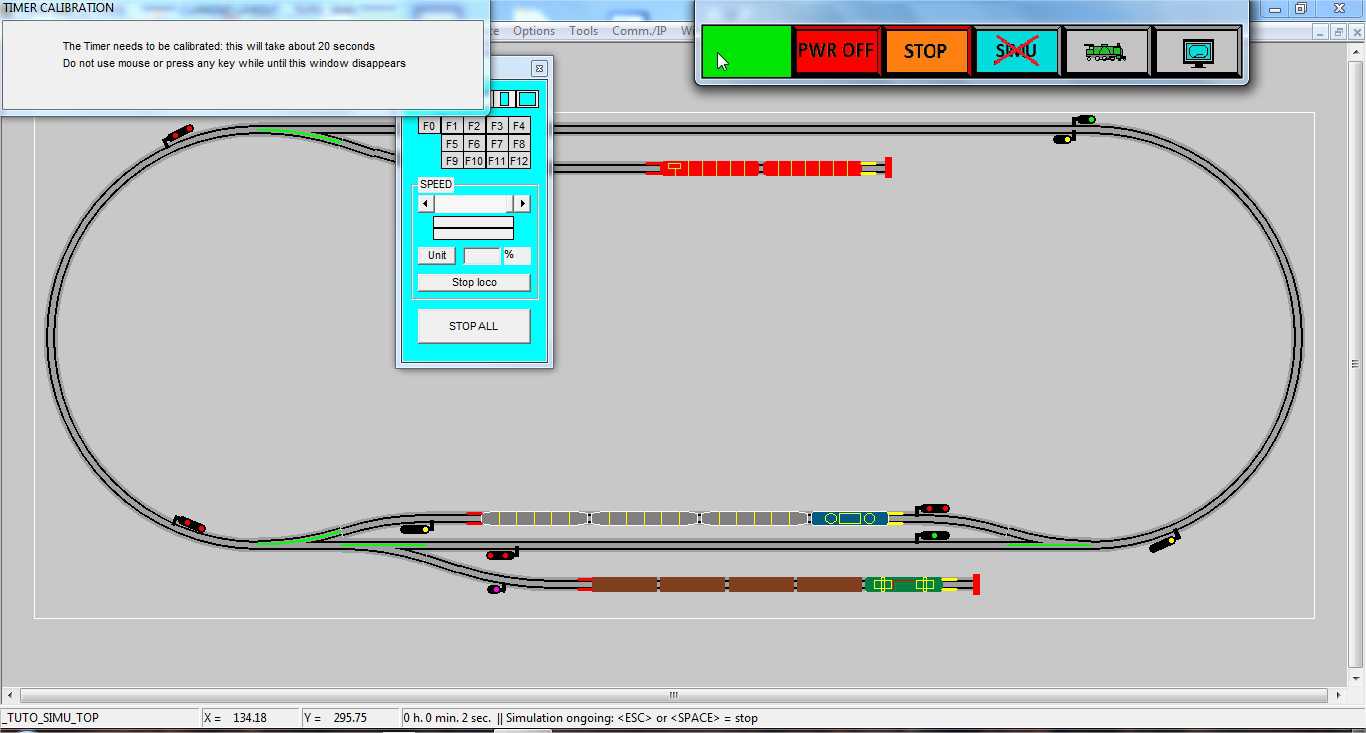
Just after button "SIMU" is pressed, the simulation starts:
-
The simulation menu gets new buttons (PWR OFF, STOP, ...)
-
A "throttle" appears for one train.
But in addition to this, the first time you start simulation, a window pops up and asks you not to touch
or move anything for about 20 seconds: timer calibration is taking place.
Timer calibration is an operation which consists of fine tuning the time measurement which may slightly
vary from one PC to the other. This operation is done only once, provided you save your layout after it's
done.

Figure
5-3: Timer calibration, on first launch.
After the calibration window disappears, the simulation starts, as can be seen on the simulation elapsed time,
in bottom line (below the layout screen).
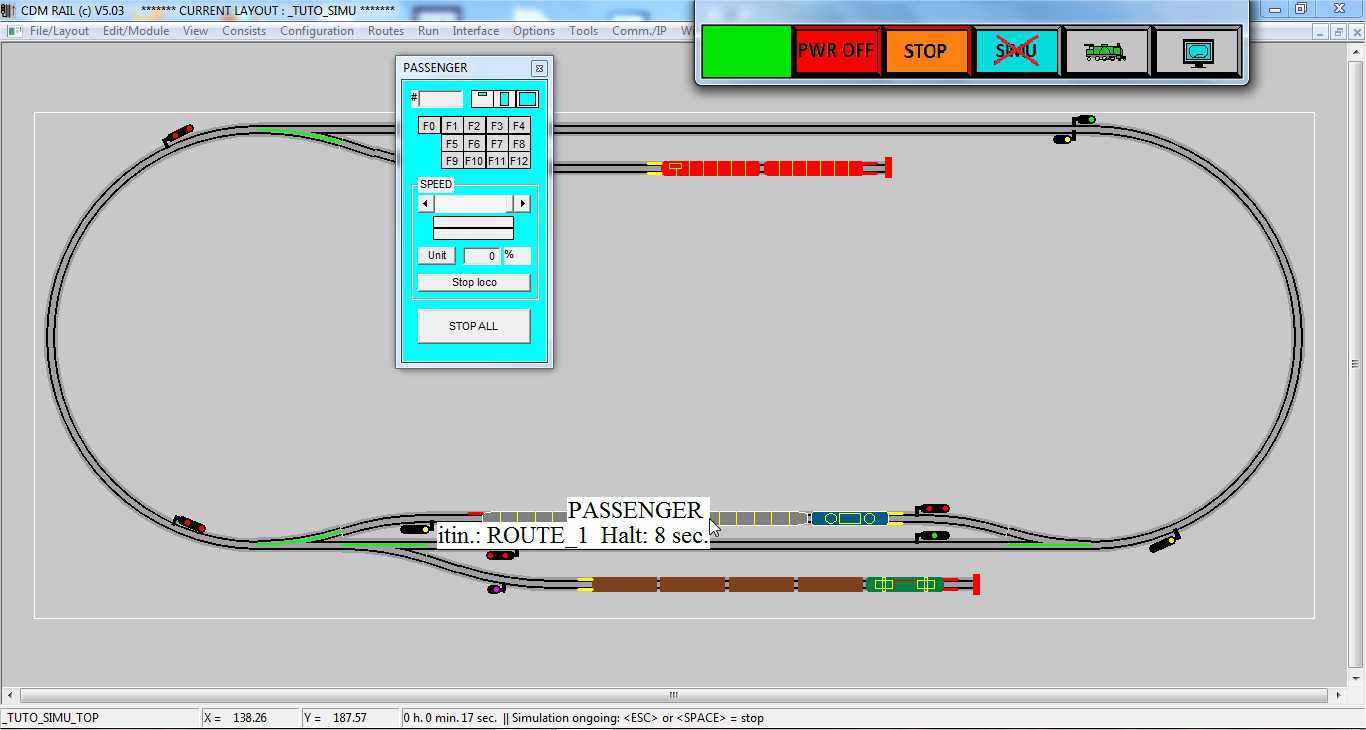
However no train moves. The reason is that all three trains have been located on a section where a halt (or stop)
time has been specified, and thus are waiting for this halt time to elapse. To check how much wait time is left
for any train, just move the mouse over it, and its name, its route, and its remaining wait time will display on
screen (see figure 5-4 below).

Figure 5-4: Display train name, route and wait time.
In the meantime, move the throttle controller so that it does not hide the tracks (see figure below).
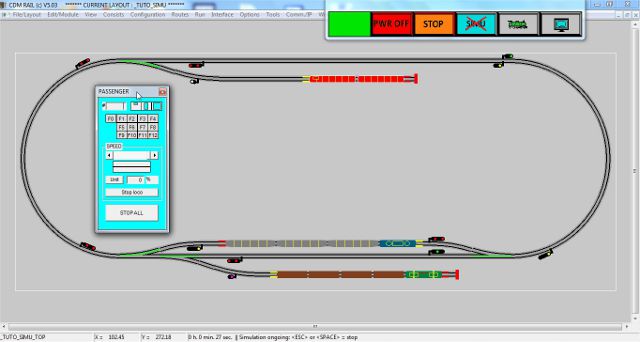
Figure 5-5: shift "throttle" so that it does not hide tracks
When (after 10 seconds) trains start to move, it is possible to watch the block security, by observing the
color of signals:
-
Red for STOP
-
yellow for SLOW
-
green for GO
However, on heavy traffic conditions (which is the case here), the signal body may be highlighted in white, as
shown in the figure below (two lower left signals). This situation means that two trains try to access the same
resource (turnout or block). In the figure below, the two trains request access to the two lower left turnouts.
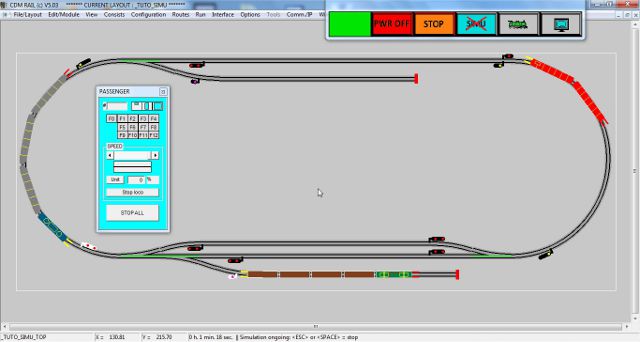
Figure 5-6: signals highlighted: two trains request access to the same resources.

The simulation will run until you stop it by clicking on button "SIMU" (with a red cross, meaning "stop simu").
BACK TO TOP OF PAGE
|
|
|
|
CHECK TRAIN NAMES, ROUTES AND WAIT TIMES
As already seen earlier, at any time, if you move the mouse over any train, its name and route will display on screen.
In addition, if the train is stopped (halted) for a specific time, the remaining time is also displayed.
Figure 5-4 (repeated): displaying train name, route and wait time by mouse move over the train.
BACK TO TOP OF PAGE
|
|
|
|
MODIFY TRAIN CRUISE SPEED / USING THROTTLE CONTROLLERS
First of all, let's say a word about throttle controllers (hereinafter named "throttles").
On simulation start, one single "throttle" is displayed, whereas three trains are present on the layout.
Of course, there is a simulation option ("Options" >> "Simulation"), which allows to display all "throttles"
simultaneously. However, it is easy to see that, when doing that, we can run very rapidly into display
problems. This is the reason why the "one throttle at a time" approach is preferred by default.
You may switch easily the single "throttle" from one train to the next, by pressing key TAB (on the keyboard).
The speed cursor of the throttle does not indicate the current speed of the train. It allows to set the cruise
speed of the train. Action on this cursor is equivalent to setting the maximum speed, when placing a train
on a layout (see step 4).
Setting the cursor at 0 stops the train, until you raise that speed again. For example, if you want to prevent
a train from restarting from a siding, just set its speed to 0, and it will stay there forever.
You can also do that by clicking button "stop loco".
If you wish to start a train halted on a section before its wait time is elapsed:
-
set its cruise speed to 0 (with the speed cursor),
-
then set its cruise speed to maximum value to restart it: the maximum value will be automatically clamped
to the maximum value authorized for this train, on its route.
Onc this is done, the wait time is cancelled, and the train starts immediately.
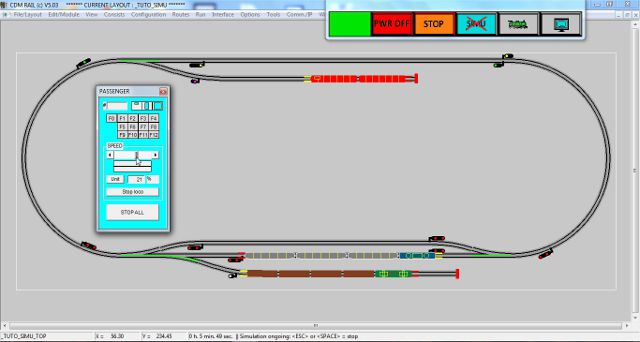
Figure 5-7: setting train cruise speed with the throttle cursor.

Functions F0 to F13 are not used in simulation. They can be used in RUN mode only.
The throttle controller may be reduced to a mini-format, by clicking on the leftmost icon, in the group
of three format icons on top of the "throttle".
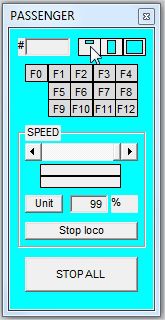
Figure 5-8: clicking on the mini-format icon
The result is shown below: obviously strongly recommended if you want to display all throttles for all trains.
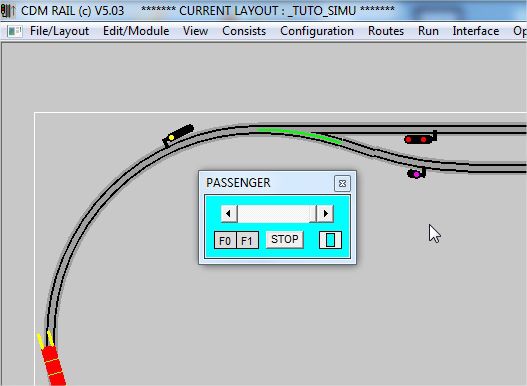
Figure 5-9: Mini-throttle aspect.
BACK TO TOP OF PAGE
|
|
|
|
STOP AND RESUME SIMULATION
The most "visible" way of stopping and resuming simulation, is through the simulation menu.
When the simulation is running, this menu looks as shown in figure below. Both "PWR OFF" and "STOP"
buttons can be used for stopping simulation (they differ only in RUN mode).

Figure 5-10: Stop simulation: both button "STOP" or "PWR OFF" may be used.
If you click either "PWR OFF" or "STOP" button, the simulation stops, and the simulation menu aspect
changes as shown in next figure.
-
Button "STOP" is replaced by button"GO" (green),
-
The state indicator, (leftmost rectangle) turns from green to orange, with label STOP.

Figure 5-11: Resume simulation.
Simulation resumes when you click "GO".
HOWEVER, there are simpler ways of doing the same thing:
-
pressing the keyboard spacebar, toggles simulation between STOP and RESUME,
-
pressing key <ESC> (escape) stops the simulation,
-
clicking button "STOP ALL", on throttles, also toggles the simulation state.
BACK TO TOP OF PAGE
|
|
|
|
SIMULATION MENU
The full description of the simulation menu (repeated below), is beyond the scope of this document.
Let's just list the functions, fom left to right:
-
Status indicator: green = GO, orange = STOP, red = POWER OFF (RUN mode only).
-
POWER OFF button. Same effect as STOP for simulation.
-
STOP button: stop simulation
-
"QUIT SIMU" button (SIMU + red cross): click to exit simulation mode.
-
Train operations: when clicking this button, a second row appears with additional buttons dedicated to
train operations (stop all trains, restart all trains, insert a train, stop a train on next block,...).
These functions are beyond the scope of this tutorial, and will be described in a specific user note.
In order to get back to the single row configuration for this menu, click within the status indicator. -
Display operations: when clicking this button, a second row appears with additional buttons dedicated to
display operations (show / hide scenery, view context handling, ...).
These functions are beyond the scope of this tutorial, and will be described in a specific user note.
In order to get back to the single row configuration for this menu, click within the status indicator.
QUIT SIMULATION MODE
In order to quit the simulation mode, just click the fourth simulation menu button (SIMU with red cross).
A window pops up, and prompts you for confirming if you still wish to quit simulation.
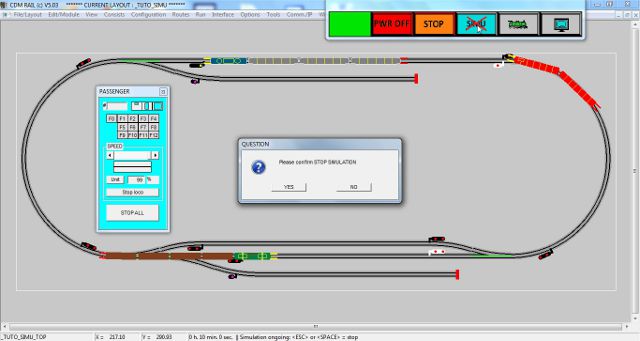
Figure 5-12: Quitting the simulation mode (confrmation window)
Any time the simulation mode is ended, a special simulation context named "_SIMU_CTXT" is automatically
generated. This specific simulation context can be restored, and in that case, when starting simulation, the new
simulation will restart exactly at the point where it was stopped, on exit.
HERE WE ARE: this tutorial is over, and hopefully gave you useful hints about the operations required for
correct simulation of a layout.
Don't forget to save your layout after the first simulation, to avoid timer calibration on next start.
Also save periodically your layout under different names (with a version number, for instance, or with the date).
 |
BACK TO TOP OF PAGE |
BACK TO TUTORIAL ROOT |